Salted Honey Yogurt Mousse - This salted honey yogurt mousse eats like a cloud: cool, creamy, and spoonable with a lightly whipped body that feels airy but still rich. Greek yogurt brings a tangy backbone while honey adds floral sweetness that balances the salt in a clean, not-too-sweet finish. The texture lands between silky whipped cream and thick yogurt, with a soft set that holds peaks without feeling heavy. It comes together fast with a bowl and whisk, making it a practical make-in-minutes dessert that still looks restaurant-style in a glass.

Salted Honey Yogurt Mousse - This recipe works because it treats yogurt like a base you can aerate, not just a topping. Full-fat Greek yogurt has enough protein structure to hold shape, but it can turn dense if you stir too aggressively or if you add sweetener in a way that breaks the foam. The key is to whip the cold cream first to medium peaks so it has a stable network of tiny bubbles, then fold gently so you keep that lift. Honey is stirred into the yogurt separately before combining, which helps it emulsify smoothly and prevents streaks or heavy pockets that collapse the mousse. After testing a few approaches, I found that adding the salt directly to the honey-yogurt mix (instead of sprinkling it at the end) built a more even salty-sweet balance, and the mousse tasted rounder from the first spoonful to the last. Another testing note: a small amount of vanilla and lemon zest makes the honey taste brighter without turning the dessert into a lemon mousse; the citrus oils add aroma that reads as freshness, while the salt keeps the sweetness from feeling flat. If you want a mousse that looks professional without complicated steps, this is the point where basic ingredients create something special. The method is straightforward but delivers professional results because you are using technique over complexity: whip to the right peaks, fold with a light hand, and chill briefly so the structure tightens. If the mousse ever looks loose, the fix is usually not more mixing (which deflates it), but colder temperature and a short rest; refrigeration helps the fat set and the yogurt proteins relax into a creamy, velvety spoon. I also like how flexible the flavor is: you can swap the topping to match the season, add cocoa for a deeper finish, or layer it with fruit for a parfait vibe, and the core texture stays consistent. This aligns with my focus on technique over complexity, where understanding the ingredient interactions makes consistent results possible, even on a busy day when you want something quick that still feels intentional.
Dietary Notes
- ✓ No-Bake Dessert
- ✓ Under-20-Minute Prep
- ✓ Protein-Rich Treat
- ✓ Make-Ahead Friendly
♥
Why You'll Love This
- Cloud-Like Texture: Whipped cream folded gently creates an airy, velvety mousse that still feels rich.
- Balanced Sweet-Salty Finish: Honey and fine sea salt build flavor without becoming overly sweet.
- Fast, Minimal Tools: One bowl and a whisk deliver a restaurant-style dessert with no baking.
- Flexible Toppings: Works with berries, stone fruit, or toasted nuts so you can adapt it to the season.
Salted Honey Yogurt Mousse
👩🍳 Author: Abderrahmane
⏰ Prep Time: 10min
❄️ Cool Time: 15
🔥 Cook Time: 0min
🥨 Yield: 4
🍞 Method: No-Bake
🌾 Diet: Vegetarian
★
★
★
★
★
Leave a review
1x
2x
3x
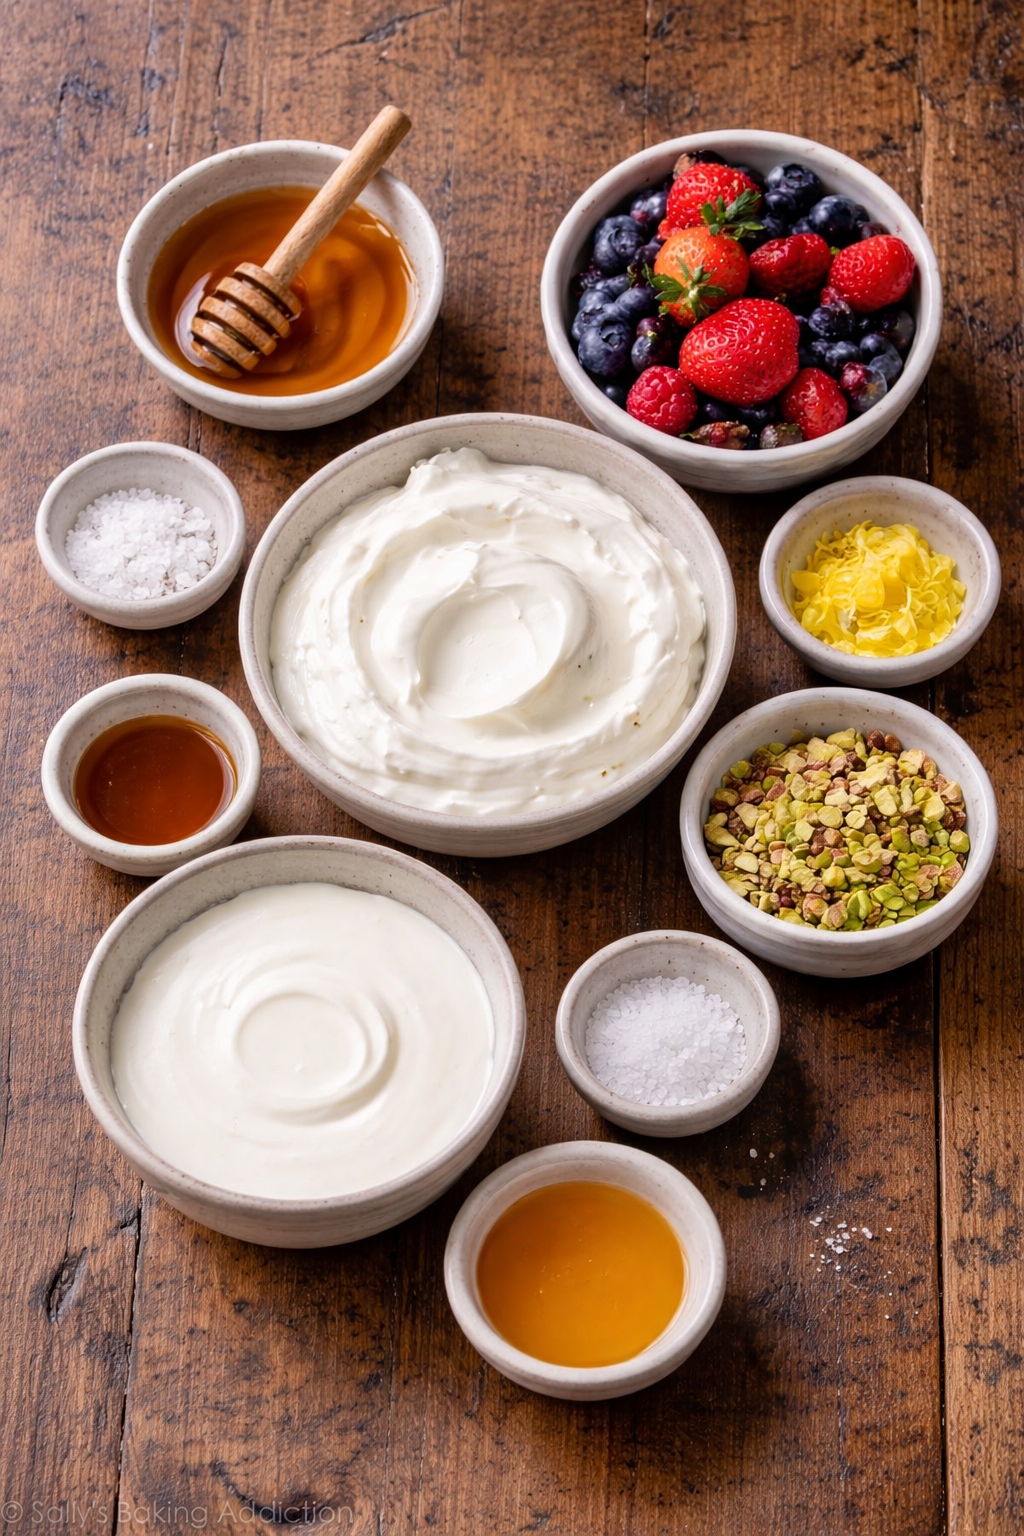
Ingredients
- 1 1/2 cups Greek yogurt, full-fat
- 3/4 cup heavy cream, cold
- 1/4 cup honey
- 1/4 tsp fine sea salt
- 1 tsp vanilla extract
- 1 tsp lemon zest, finely grated
- 1 1/2 cups fresh berries or sliced ripe fruit
- 2 tbsp toasted pistachios or almonds, chopped
- 1 tbsp extra honey for drizzling
- pinch flaky sea salt for finishing
Ingredient Notes:
- Greek yogurt, full-fat Choose full-fat Greek yogurt for a creamy, velvety body; low-fat versions can turn watery and make the mousse slack. If your yogurt looks loose, strain it briefly so the protein structure stays stable and the final texture holds a tender spoon.
- heavy cream, cold Whip very cold heavy cream to medium peaks so it stays fluffy and does not curdle or split; overwhipping creates a grainy texture that collapses when you fold. Cold cream also builds a more stable foam for a quick no-bake dessert.
- honey Use a fragrant honey to build flavor without needing extra sugar; warm, thick honey blends best when whisked into the yogurt first, helping it emulsify smoothly. If the honey is crystallized, warm it slightly so it mixes without deflating the mousse.
- fine sea salt Fine sea salt dissolves fast and creates an even sweet-salty balance, so every bite tastes consistent. Adding it to the yogurt base early prevents salty pockets and helps the dessert taste clean instead of flat.
- vanilla extract Vanilla adds aroma that reads as richer sweetness, even with less honey, and it keeps the finish smooth. Use pure extract if possible for a more restaurant-style profile that pairs well with fruit.
- lemon zest, finely grated Lemon zest brings bright citrus oils that cut richness and keep the mousse tasting fresh, not heavy. Grate only the yellow part to avoid bitterness, and fold it in gently so the mousse stays airy and tender.
- fresh berries or sliced ripe fruit Pick ripe but firm fruit so it stays crisp and juicy against the creamy mousse; soft fruit can leak and thin the surface. For best texture, add fruit right before serving so the topping stays vibrant and does not turn watery.
- toasted pistachios or almonds, chopped Toast the nuts briefly to develop flavor and add crisp contrast to the velvety base; the crunch keeps each spoonful interesting. Chop finely so they sprinkle evenly and do not sink into the mousse.
- extra honey for drizzling A small drizzle on top adds a glossy finish and a clear honey note without making the mousse overly sweet. Drizzle lightly so the topping stays balanced and the mousse remains fluffy, not weighed down.
- flaky sea salt for finishing Use a tiny pinch of flaky salt at the end for a clean pop that builds flavor and highlights the honey. Add it right before serving so it stays crisp and does not dissolve into the topping.
Instructions
-
1Step 1: Chill four serving glasses and a mixing bowl for 5 minutes until cool to the touch - colder tools keep the cream stable and help the mousse hold fluffy peaks.
-
2Step 2: Whisk the Greek yogurt, honey, fine sea salt, vanilla, and lemon zest together until smooth and glossy - dissolving the honey and salt first helps the mixture emulsify for a creamy, velvety base.
-
3Step 3: Whip the cold heavy cream for 2 to 3 minutes until medium peaks form and the whisk leaves soft ridges - medium peaks trap air for lift without turning grainy from overwhipping.
-
4Step 4: Fold one-third of the whipped cream into the yogurt mixture with a spatula using wide, gentle strokes until mostly combined - this lightens the base so the remaining cream folds in without deflating.
-
5Step 5: Fold in the remaining whipped cream just until no white streaks remain and the mousse looks airy and uniform - stopping early guarantees a fluffy texture instead of a dense, overmixed cream.
-
6Step 6: Spoon or pipe the mousse into the chilled glasses, tapping each glass once to level the top - clean portioning creates a smooth surface and a restaurant-style look.
-
7Step 7: Chill the portions for 10 to 15 minutes until the mousse feels slightly firmer and holds a neat spoon mark - a short rest helps the fat set and prevents a loose, runny finish.
-
8Step 8: Top with fresh fruit and toasted nuts, drizzle with a small ribbon of honey, and finish with a tiny pinch of flaky salt - the crisp topping and salty-sweet contrast build flavor and make each bite pop.
Nutrition Facts
Calories 280
Protein 14g
Carbs 28g
Fiber 2g
Sugar 24g
Fat 14g
Sodium 220mg
Potassium N/A
Serving Suggestions
Spoon the mousse into chilled glasses so the layers look clean and the texture stays fluffy. Top with fresh berries or sliced ripe fruit right before serving so the fruit stays crisp and juicy against the creamy base. For a more polished presentation, add a small drizzle of honey in a thin ribbon, then finish with flaky salt and a pinch of lemon zest for aroma. If you have time, let the assembled glasses rest in the fridge for 10 to 15 minutes; the mousse firms slightly, the flavors meld, and the spoonfuls look smooth and glossy. Serve cold for the best creamy contrast and the most stable peaks.
How to Store?
Store the mousse in covered glasses or an airtight container in the refrigerator for up to 3 days; keep toppings separate if you want the cleanest texture. If the mousse thickens too much after chilling, give it one or two gentle folds with a spoon to loosen it without deflating the structure. Freezing is not ideal because yogurt can separate and turn grainy when thawed, but you can freeze it if needed for up to 1 month and treat it like semifreddo; thaw in the fridge and re-whisk briefly if it looks uneven. For make-ahead serving, portion the mousse the day before and add fruit, nuts, or honey only at the last minute so everything stays fresh and visually crisp.
If you enjoyed this Salted Honey Yogurt Mousse or any other recipe on my blog,
please leave a ⭐ star rating and let me know how it went
in the comments below. I appreciate you taking time to read about this recipe, thank you!


Leave a Comment