Classic Apple Cinnamon Pie - This classic apple cinnamon pie bakes up with a deeply golden, flaky crust and tender apple slices that hold their shape without turning mushy. The filling is glossy and spoonable, balancing warm cinnamon and brown sugar richness with a clean lift of lemon so it never tastes flat. Each slice gives you crisp edges, a buttery snap, and a soft, juicy center with a light caramel note from the apples. It is a reliable make-ahead dessert that rewarms beautifully for gatherings and holiday tables.
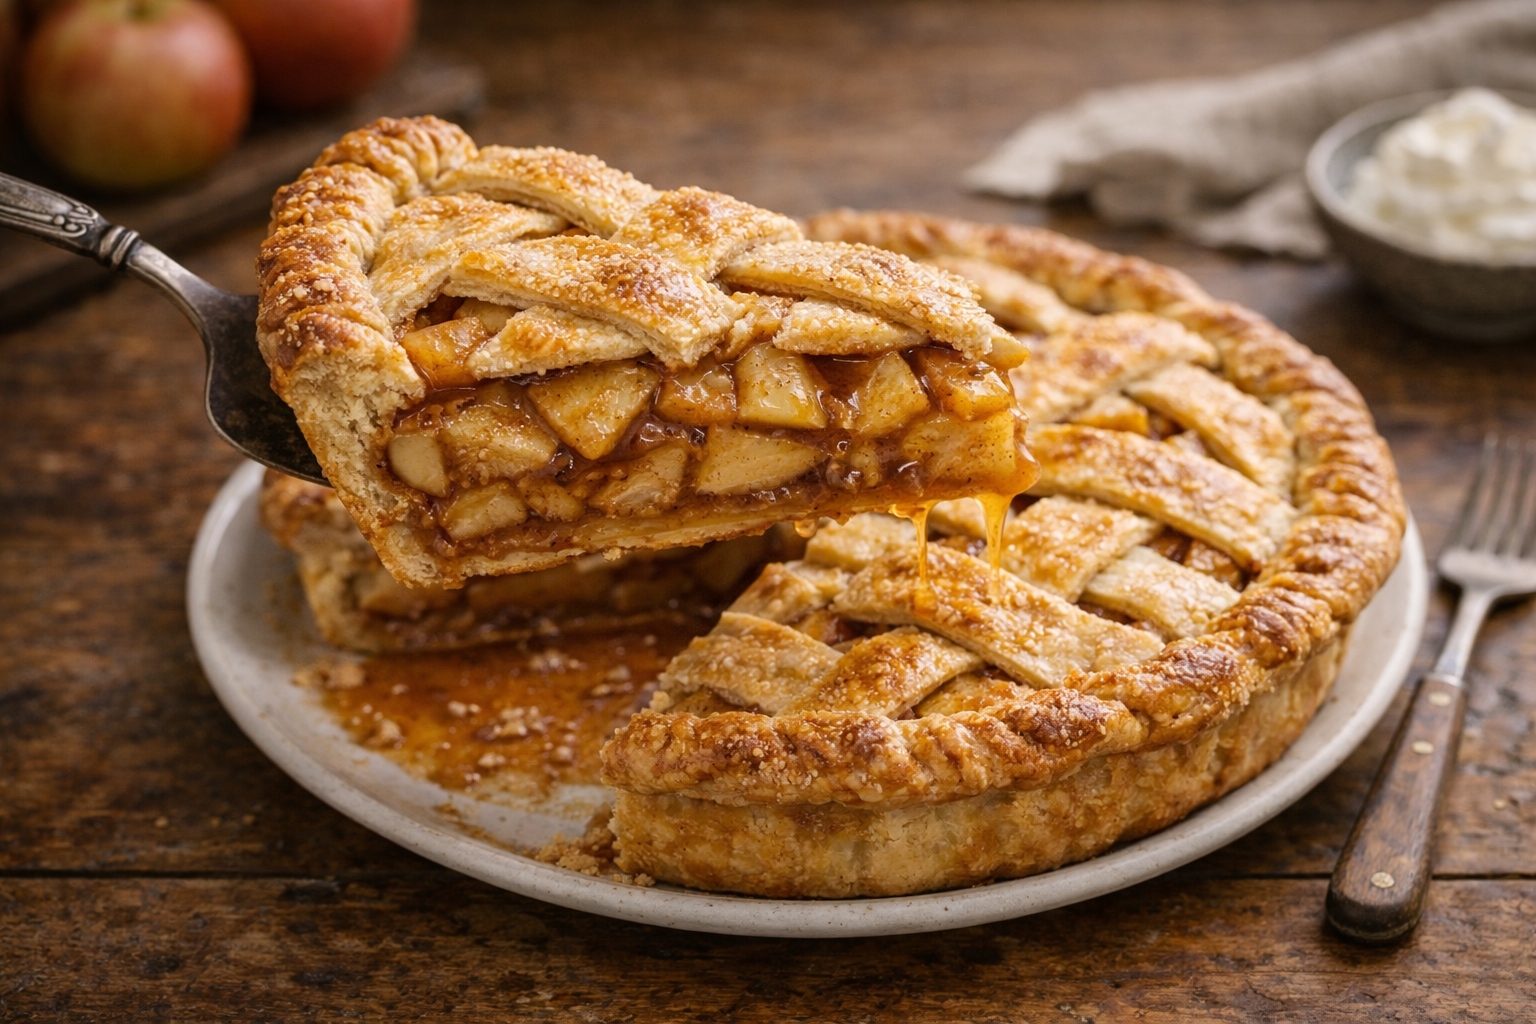
Classic Apple Cinnamon Pie - This pie works because it treats structure and moisture as the main goals, not just sweetness. Apples release water as they heat, and if that water is not managed, the filling turns loose and the bottom crust goes soggy. After testing multiple approaches, the most consistent result came from slicing apples evenly, macerating them briefly with sugar, then cooking the released juices down into a concentrated syrup before the pie ever hits the oven. That one step builds flavor through gentle caramelize cues, thickens naturally, and prevents watery results without loading the filling with extra starch. I also found that a mix of apple varieties gives a better bite: one that stays firm for clean slices and one that softens for a jammy, velvety background. For the crust, cold butter is not just a rule, it is the mechanism: small, cold pieces melt and create steam pockets, forming flaky layers while keeping the crumb tender. The method is straightforward but delivers professional results because every step has a purpose you can see and feel, from the sandy crumb stage to the final bake when the edges turn bronze and the center bubbles thickly. This shows how basic ingredients create something special when you understand what they are doing. My approach is technique over complexity: focus on temperature, timing, and cues, and you can guarantee a pie that slices cleanly, tastes balanced, and stays crisp even after it rests. I like to finish the filling with lemon and a small pinch of salt because it develops flavor without making the pie taste sharp; it simply makes the apples taste more like themselves. If your oven runs hot, a simple foil shield protects the rim while the center finishes, and that is the kind of practical habit that turns a good recipe into a dependable one for every season.
Dietary Notes
- ✓ Make-Ahead Friendly
- ✓ Flaky Butter Crust
- ✓ Holiday Table Ready
- ✓ Clean Slice Filling
♥
Why You'll Love This
- Flaky, Tender Crust: Cold butter and gentle mixing create crisp layers with a tender bite.
- Balanced Apple Flavor: Lemon and brown sugar build flavor so the filling tastes bright and rich at the same time.
- No Soggy Bottom: Concentrated juices and proper venting guarantee a set filling and a crisp base.
- Crowd-Ready and Flexible: Choose your apple mix and spices to fit the season while keeping reliable results.
Classic Apple Cinnamon Pie
👩🍳 Author: Abderrahmane
⏰ Prep Time: 35min
❄️ Cool Time: 180
🔥 Cook Time: 55min
🥨 Yield: 10
🍞 Method: Baking
🌾 Diet: Vegetarian
★
★
★
★
★
Leave a review
1x
2x
3x
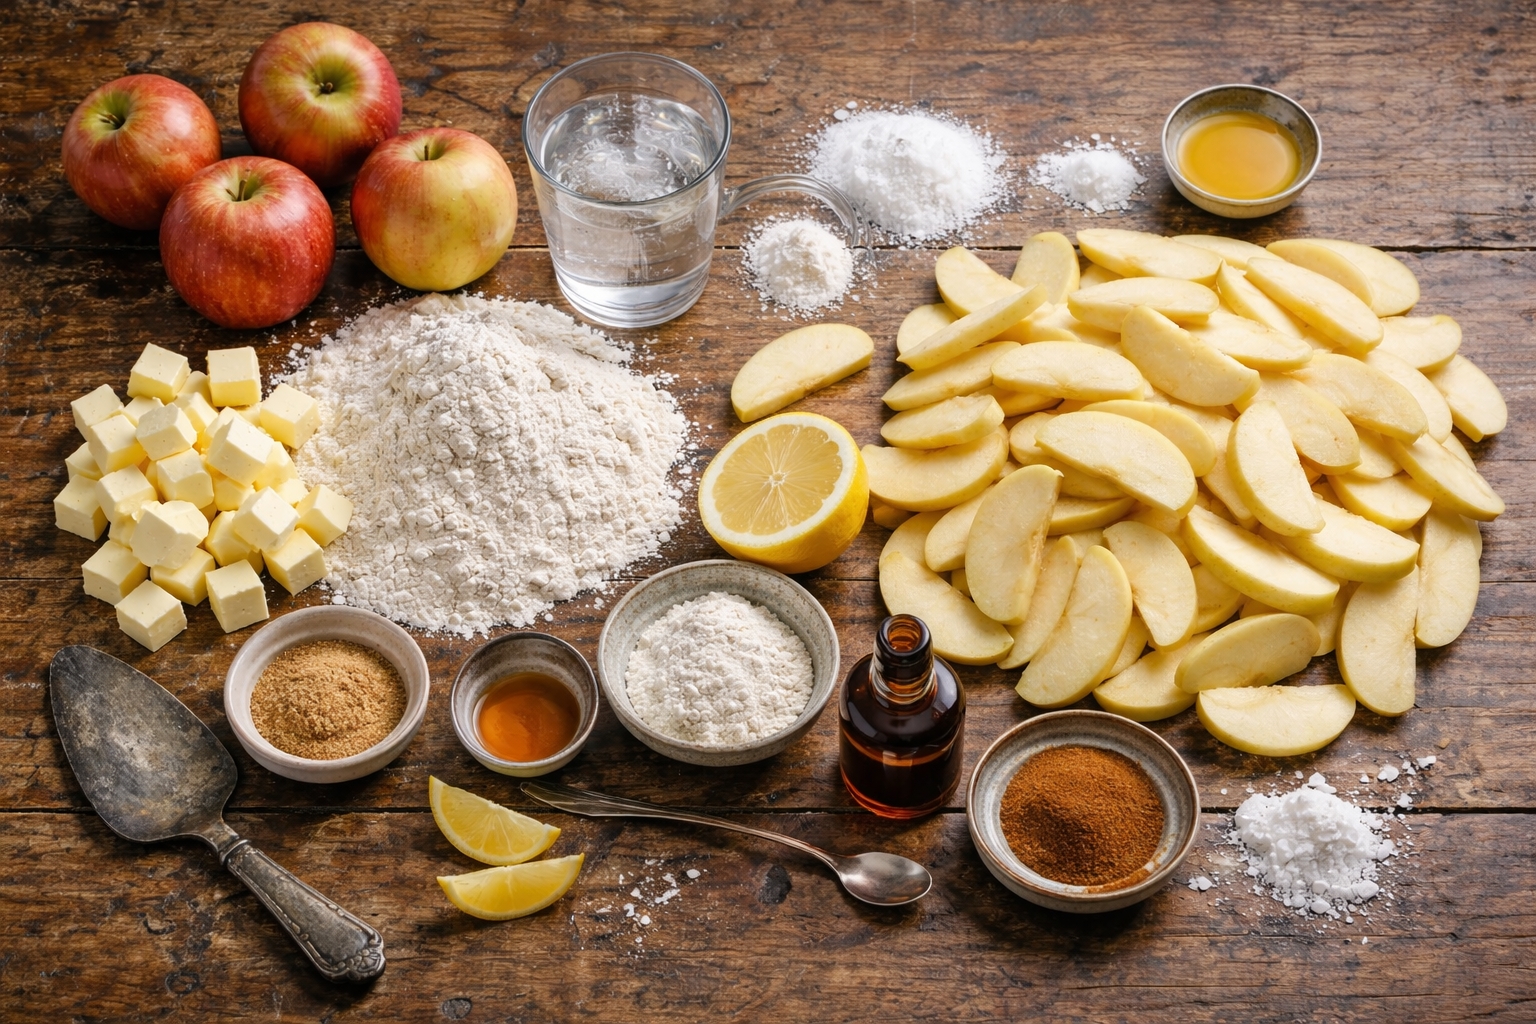
Ingredients
- 2 1/2 cups all-purpose flour
- 2 tbsp granulated sugar
- 1 tsp fine sea salt
- 1 cup (2 sticks) unsalted butter, very cold and cubed
- 6 to 8 tbsp ice water
- 3 lb apples, peeled, cored, and sliced 1/4-inch thick (mix of firm and tender varieties)
- 3/4 cup light brown sugar, packed
- 2 tsp ground cinnamon
- 2 tbsp cornstarch
- 1 1/2 tbsp lemon juice
- 1 tsp vanilla extract
- 1 large egg, beaten with 1 tsp water (egg wash)
Ingredient Notes:
- all-purpose flour Use a light hand when measuring flour so the crust stays tender instead of dry. Once hydrated, mix only until the dough holds together; overworking develops gluten and reduces flake, which is the opposite of a crisp, flaky goal.
- granulated sugar A small amount of sugar helps the crust caramelize at the edges and gives a subtle crunch. It also balances the savory notes from butter and salt, building flavor without making the crust taste sweet.
- fine sea salt Salt is not optional here: it develops flavor in the crust and keeps the apple filling from tasting one-note. If your butter is very fresh, this pinch makes the aroma feel more restaurant-style and rounded.
- unsalted butter, very cold and cubed Keep the butter very cold so it stays in distinct pieces; those pieces melt and create steam pockets that form flaky layers and a tender crumb. If the dough warms, chill it briefly so the butter does not smear, which can lead to a tough crust.
- ice water Add ice water gradually to hydrate flour without turning the dough sticky. This controlled mixing supports a one-bowl workflow while still delivering a crisp, flaky texture because the butter remains cold and the dough stays light.
- apples, peeled, cored, and sliced 1/4-inch thick (mix of firm and tender varieties) Slice apples to an even thickness so they cook at the same rate and the pie bakes consistently. A mix of firm and tender varieties gives you clean slices with a velvety background, and it helps avoid a watery filling that can happen with a single soft apple type.
- light brown sugar, packed Brown sugar adds moisture and a caramel-forward note that pairs with cinnamon without overpowering the fruit. Packing it lightly but consistently helps you repeat results; too much can make the filling loose and overly sweet.
- ground cinnamon Use fresh cinnamon so the spice reads warm and clear instead of dusty. Cinnamon builds flavor as the filling simmers, and it supports that cozy holiday profile without masking the apples natural sweetness.
- cornstarch Cornstarch thickens the juices into a glossy, spoonable filling that sets cleanly after cooling. Sprinkle it in off heat and stir well to avoid lumps; uneven starch can create gummy spots instead of a smooth, velvety slice.
- lemon juice Lemon juice keeps the filling bright and prevents the sweetness from tasting heavy. It also slows browning on the apple slices and gives a gentle acidic lift that makes the cinnamon and caramel notes taste more defined.
- vanilla extract Vanilla rounds the aroma and ties together the butter, brown sugar, and apple notes. Add it after reducing the juices so the fragrance stays clear, and it helps the pie taste balanced even when served warm.
- egg, beaten with 1 tsp water (egg wash) Egg wash creates a shiny, deeply golden top crust and helps the surface crisp as it bakes. Brush a thin, even layer so it browns without pooling, which can block vents and trap steam in the center.
Instructions
-
1Step 1: Whisk the flour, sugar, and salt in a large bowl until evenly blended - this distributes seasoning so the crust tastes balanced in every bite.
-
2Step 2: Cut in the very cold butter cubes with a pastry cutter or your fingertips until you see pea-size pieces and some flatter shards - keeping visible butter pieces is what later melts and forms crisp, flaky layers.
-
3Step 3: Drizzle in ice water 1 tablespoon at a time, tossing with a fork until the dough holds together when you squeeze it - gradual hydration prevents a sticky dough and guarantees a tender crumb instead of toughness.
-
4Step 4: Divide the dough into two discs, wrap tightly, and chill for at least 60 minutes - resting relaxes gluten and re-chills the butter so the crust bakes up flaky rather than dense.
-
5Step 5: Combine sliced apples, brown sugar, cinnamon, salt, and lemon juice in a large bowl and let sit for 20 minutes until juices pool - macerating draws out moisture early so you can control it before baking.
-
6Step 6: Pour the apple mixture and juices into a wide skillet, simmer over medium heat for 8 to 12 minutes until the released liquid reduces into a glossy syrup that coats a spoon - reducing concentrates flavor and prevents a watery filling that can soak the bottom crust.
-
7Step 7: Off heat, sprinkle in cornstarch and stir until no dry pockets remain, then stir in vanilla and cool the filling to warm, not hot - the starch thickens best when evenly dispersed, and cooling protects the dough from melting during assembly.
-
8Step 8: Roll one dough disc into a 12-inch circle, fit it into a 9-inch pie dish, and chill the lined dish for 10 minutes - chilling firms the butter again so the base holds structure during the first stage of baking.
-
9Step 9: Spoon the cooled apple filling into the crust, roll the second disc, place it on top, seal and crimp the edges, then cut vents - venting releases steam so the filling sets thickly instead of bubbling up and breaking the crust seal.
-
10Step 10: Brush the top with egg wash, place the pie on a lined sheet pan, and bake at 425°F for 20 minutes, then reduce to 375°F and bake 30 to 35 minutes until deeply golden and the center bubbles thickly through the vents - high heat sets the crust structure early while the lower heat finishes cooking the apples without burning the rim.
-
11Step 11: Cool the pie on a rack for at least 3 hours until the filling is set and slices hold their shape - resting lets starches finish gelling so you get clean wedges instead of a runny pool.
Nutrition Facts
Calories 410
Protein 4g
Carbs 58g
Fiber 4g
Sugar 28g
Fat 19g
Sodium 320mg
Potassium N/A
Serving Suggestions
Serve the pie slightly warm so the crust stays crisp and the cinnamon aroma is most pronounced, about 30 to 45 minutes after reheating. For a clean presentation, slice with a long serrated knife using gentle sawing through the top crust, then lift with a wide pie server to keep the wedge intact. Pair with vanilla ice cream for creamy contrast or lightly sweetened whipped cream for a softer finish, and add a small sprinkle of flaky salt on top if you like a caramel-forward note. If serving for a holiday meal, bake the pie earlier in the day and let it cool fully, then warm slices briefly so you get the best texture without a runny center.
How to Store?
Cool the pie completely at room temperature, then cover and store in the refrigerator for up to 4 days; chilling keeps the filling set and makes neater slices. Reheat individual slices on a sheet pan in a 325°F oven for 10 to 15 minutes until the crust feels crisp and the center is warm, or use a toaster oven to restore flake without making the filling watery. The baked pie freezes well for up to 2 months: freeze slices on a tray, wrap tightly, then rewarm from frozen in a 325°F oven until hot throughout. For make-ahead convenience, prepare the dough up to 3 days ahead and keep it chilled, and you can also cook the apple juices into syrup a day early so assembly is fast on baking day.
If you enjoyed this Classic Apple Cinnamon Pie or any other recipe on my blog,
please leave a ⭐ star rating and let me know how it went
in the comments below. I appreciate you taking time to read about this recipe, thank you!


Leave a Comment